Wednesday 14 January 2015

fondations

foundation tips and tricks


This next blog will be about picking the perfect foundation for your skin type and also a few tips for applying it for the perfect look. First off knowing what skin type will really help for example if you have really sensitive skin you'd want to get a lightweight foundation and something oil free for example like the Laura Mercer foundation. Another key to having the perfect foundation is applying primer all over your face and neck to keep your foundation nice and matte all day long. Another really important part in doing foundations is your brushs, personally i prefer applying my foundation with a foundation brush and blending it with a beauty blender. The main brush i use in my every day foundation routine is a foundation brush from smashbox that you can buy online at:

 http://www.smashbox.com/product/6009/17773/Brushes-Tools/FOUNDATION-BRUSH-13/index.tmpl  

or at any beauty supply store. The next thing i use is a beauty blender, I love beauty blenders because it blends the foundation in so flawlessly and makes it look more natural and not cakey. I highly recommend using and buying a beauty blender, you can find them at any shoppers drug mart or sephora.  

Quick hack: Always swipe downwards while applying your foundation  this will make your pores less visible 


Thursday 6 November 2014

Mascara edition

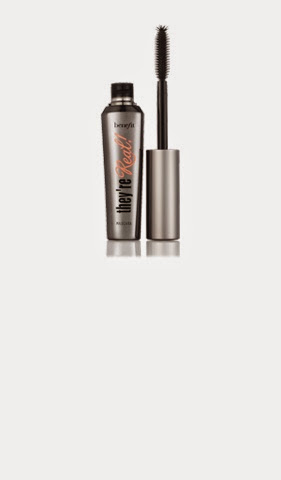
the key to perfect long lashes is the perfect mascara I've been using mascara for a while now so I've experimented with quit a few different brands, since Mac is well known i wanted to try a MAC mascara, i spent 22 dollars on a mascara i wasn't so pleased with. It worked well at first but it starting making my lashes clumpy and hard which is obviously not a cute look. So I went on a hunt for the perfect mascara, first i started reading reviews on mascaras from brands like sophora and MAC but i never found anything i liked. After that i went to the the actual store sophora to see if there was anything i liked but i didn't find anything so then i went shoppers drug mart and an employee helped me and recommended this mascara by benefit since I've never heard of this brand I was a bit skeptically at first, but I was hearing all the great things about the mascara that I was tempted to buy the it so I bought it. It was a 30$ mascara but also came with a free gel eyeliner.As soon as I got home I tried it and I was honestly so satisfied! Probably one of the best mascaras I've ever used, I really recommend this mascara to anyone who wants to have long natural looking eyelashes! And I was very satisfied with the free gel liner that came with it as well they both work really good together. You can buy this mascara at any shoppers drug mart and also you can order it online at http://www.benefitcosmetics.com  

Tip: if you have a mascara that you really like and it works really good but its starting to get dry, soak it in a cup of warm and itll be like new!

Tuesday 4 November 2014

More hacks!!

This next hack will be about hidden secrets about pencil eyeliner that you probably didn't know!  

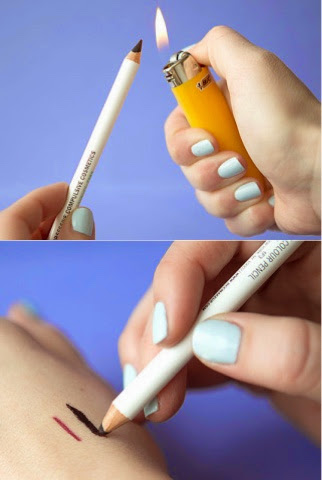
Have you ever ran out of gel liner at the worst possible time? I know I have! So this tip really comes in handy for me. Hold your kohl eye pencil under a flame for one second, let it cool for at least 15 seconds, and there you have it! Your pencil eyeliner is now a gel liner, and easy to apply! I use this now on almost a daily basis because I find having a gel liner in pencil form is soo much easier and faster to apply.


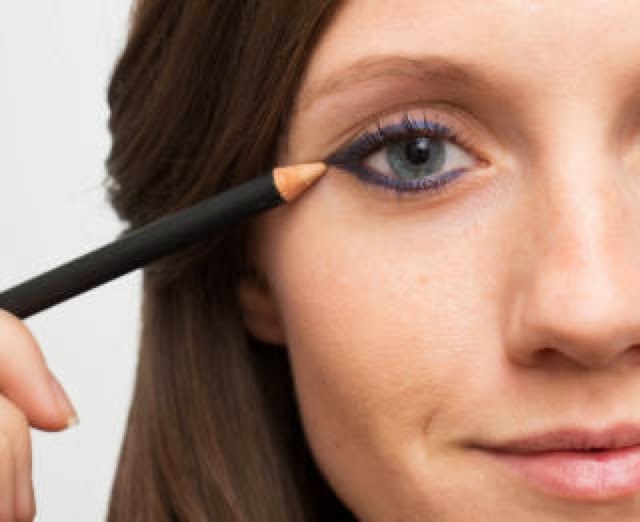
Almost every morning when I'm doing my eyeliner I end up making a mistake and making a huge mess on my eye and would have to restart, I hate it because  in the mornings I barely have any time and this just makes me late. So this tip could really you if your having the same problem as me. You can easily fix smudged eyeliner with a skin colored eyeliner! It's simple just draw over it with a skin-colored liner instead of wiping it off and starting over. This is also a great trick if you want to make the line super sharp and it'll almost make your eyeliner last longer! 

Friday 24 October 2014

lipstick edition


Every girl likes wearing their favourite lipsticks on special occasions or just to change up your look,  my personal favourite is a matte lipstick because it doesn't look shinny and they also last longer then shinny lipsticks. 
Too add that the brand is really important too from expensive or cheap the quality is everything.  Trust me You'd rather spend 20$ on a good working lipstick that you really like and that last long  rather then buying an 8$ one and keep having to buy a new one cause the quality is so bad. In my opinion Mac has the best lipstcisks they are expensive but the quality is really good and they last longer then other lipsticks from brands  like sophora or cover girl . 


When i first wearing lipstick  a common  problem I always seemed to have with any kind of lipstick is getting it on my teeth and making a big mess (not cute) so this is what I found worked for me to avoid this from happening and  to keep lipstick off your teeth, simply put your lipstick on, then put your index finger in your mouth and pull it out. Any extra lipstick should get on your finger instead of your teeth. Another tip related to teeth is avoiding any orange or brown shades,  They have the tendency to bring out the yellow shades in your teeth so avoiding these colours will make your teeth look whiter.   


 picking the perfect shade 

Another important thing to remember when picking or even applying a lipstick is making sure you have the perfect shade for your skin tone. So if you have a fair skin tone you'd want a Glossy transparent pink, light peach, honey, beige. If you have a medium skin tone you'd want to get anything in the  Medium pinks, light mocha, caramel, delicate red, medium apricots, tabgy peach. If you have an olive complexion a Strong red, deep rose, berry, toffee, mahogany, dark apricots,or brown red would be suitable. finally  If you have a ebony skin tone you'd want to get Deep brownish red, deep berry, deep fuchsi or golden beige. But these are just suggestions for what would look best with your skin tone doesn't  mean you can only wear those colours . 


Tuesday 14 October 2014

Whenever people hear contouring they think some fancy super hard makeup only professionals can do, but it actually more easy that it seems and sounds!
I was a little intimidated the first time i tried this look on myself, but here are a few tips that i used and that could help you.
/ first off don't go out and spend a fortune on different shades of foundations for your highlighting and shading, simply use the products you have already for example use a matte eye shadow two shades darker the your normal skin tone for your shading or even a matte bronzer then for your highlighting just use a concealer which obviously should be a shade or two brighter then your normal skin tone. so to began After you've applied your base, mark the areas you want to contour ( the hollows under your cheekbones, your temples, along your hairline, jawline, the sides of your nose, the tip of the nose, and the crease of your eyes). Next, use an all-over cream highlighter, like Mac Cosmetics Cream Color Base in Luna or a concealer( cheaper version) on the tops of your cheekbones, on the center of your forehead, the bridge of your nose, the center of your chin, and on your Cupid's bow then blend it all with either a blending brush, telephoto face brush or a beauty blender. I prefer using a face brush then at the end a beauty blender just to make sure its all blended in nicely and evenly. 


Friday 10 October 2014

10 Life-Changing Makeup Hacks every girl Should Know

Since I'm someone who uses makeup on the daily basis i thought doing a blog about makeup hacks and tricks could come in handy for other girls like me. After reading these hacks I was really surprised and I was really excited to try them out. The first thing I learned was how utensils could come in handy while applying eyeliner and mascara! 

Use a spoon to create the perfect winged liner.

/Yes, i know this looks and seems kinda weird but it actually works! Just by Holding the stem of a spoon against the outer corner of your eye and drawing  the straight line as the first step for your cat-eye. Then, flipping the spoon so it's hugging your eyelid, and using  the rounded outer edge creates a perfectly curved winged effect. I've had trouble doing my winged liner for a while but this trick actually really helps and makes it so much easier to apply. 
tip: make sure to use a gel liner for this look or even a liquid liner. (I prefer using gel liner

Use that same spoon to avoid mascara marks on your upper eye lid.

/Usually for me my mascara is the last thing i will apply while doing my makeup, since I have really long eyelashes i always get mascara marks on my eyelid, and it ruins my eye shadow and even sometimes my eyeliner. So this trick came in really handy for me and its really simple! Just hold the spoon so it's hugging your eyelid, and then apply as thick of a coat as you like or as much as you normally would. As you sweep the mascara brush against your lashes and back of the spoon, watch as the residue coats the back of the utensil rather than your skin. I love this trick so much i use it on a daily basis.